As my senses of smell and taste have still not fully returned (this head cold is really lingering), I thought I'd write another guide.
What is a gaiwan?A gaiwan (or "guywan" with Wade-Giles romanization) is actually a pretty simple little contraption. It consists of just three parts, as shown here: the lid (left), the cup (center), and the saucer (right). It can be made from pretty much anything except metal (which would absorb far too much heat), such as glass, porcelain, or clay.
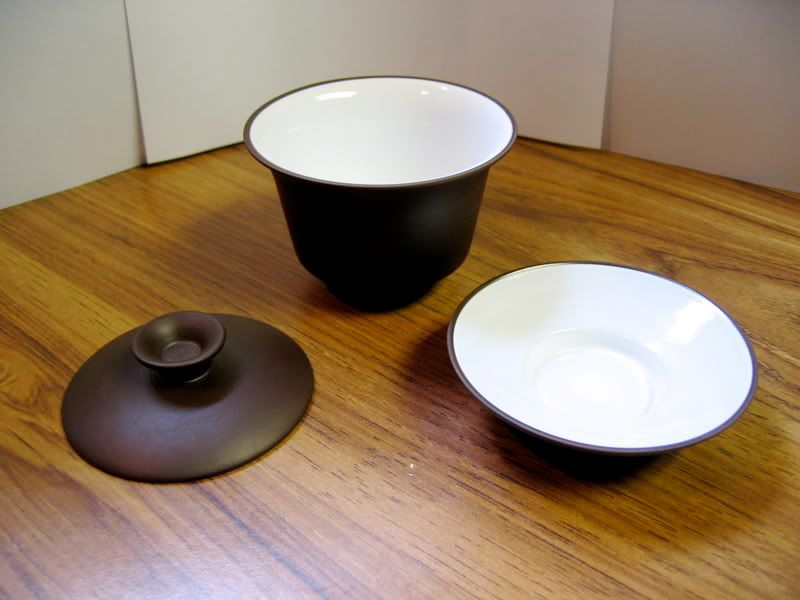
There are no bells and whistles here-- a gaiwan is essentially the same as any standard European teacup, except that it has a lid and no handle. Though the gaiwan can be used as a cup, it is more importantly used to brew the tea itself, replacing the teapot. One can, as I just mentioned, drink straight from the gaiwan, or one can decant the liquor into another cup or serving pitcher (not shown).
Why should I use a gaiwan?Most Americans have never seen or heard of a gaiwan. Here in the states, we are far more familiar with 10-cup teapots and 8+ oz coffee mugs, or other large scale tea preparation tools. In contrast, the threshold volume at which a gaiwan is considered
large is about 4 oz. In my opinion, tea is best enjoyed in small quantities, so the gaiwan is a perfect tool for making good tea.
As any cook can tell you, recipes just don't turn out the same when preparing for twenty people versus only two. Subleties can be lost, and often the recipe will need major changes in its ingredients to bring out the right flavors.

Unfortunately, when working with tea, the only ingredients we can change are leaves and water. We can't just add another teaspoon of a subtle fruity flavor or a pinch of citrus notes (well, we can with flavorings, but I'm talking about unflavored teas here) to make large quantities of tea taste right. This means that a tea's true flavors and aromas really only come out when it is made in small batches.
The other great thing about gaiwans is that you can use them for basically anything. The only things that I see potential problems with are Japanese greens and rooibos-- these leaves are so small that it may be difficult to decant the liquid without letting quite a few of them through. Brewing black teas may also pose a problem, as it requires working with very hot water, but it can be done.
How do I use a gaiwan?It was a bit daunting to use a gaiwan the first time I tried. To be honest, I'm still not quite sure I'm doing everything right. Nevertheless, I have put together a little guide (emphasis on little) for other beginners. Note that amount of leaf, water temperature, washing techniques, etc. will vary from tea to tea as well as person to person, so I won't even try to get into that here. For a good summary, check out
Chinese Teas 101.
When I started using a gaiwan, the hardest part was figuring out how to hold and pour the darn thing properly. I read on some website (I can't remember where, sorry) that you were supposed to hold the gaiwan cup around its rim with your thumb and middle fingers, and then hold back the lid/tilt the apparatus with your middle finger. This led to some catastrophic failures-- tea all over the place, half of the leaves in my drinking cup, burnt fingers-- so I searched around some more. Taking strategies from both online sources (such as Chinese Teas 101's
large gaiwan handling guide) and my own limited experience, I eventually found a fairly easy technique that also eliminated the risk of bodily injury/disfigurement. (Okay, disfigurement may be a bit over the top, but I couldn't resist.) So, without further ado, I give you my four step method to success.
| Step 1: Just before you wish to stop infusing, tilt the gaiwan lid. It should be tilted enough that liquid can quickly escape the cup, thus ending the infusion process precisely when you want, but it should not be opened enough to allow tea leaves to flow out with the liquid. | 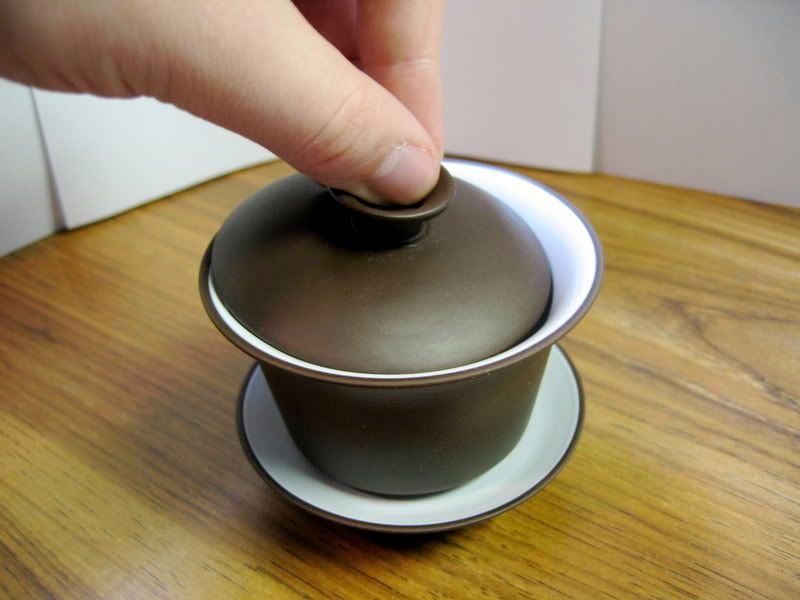 |
| Step 2: Carefully pick up the gaiwan. Placing your thumb in the dimple at the top of the lid, hold the lid tightly against the cup. Shimmy your fingers underneath the saucer (the saucer serves as insulation, preventing any chance of burnination). | 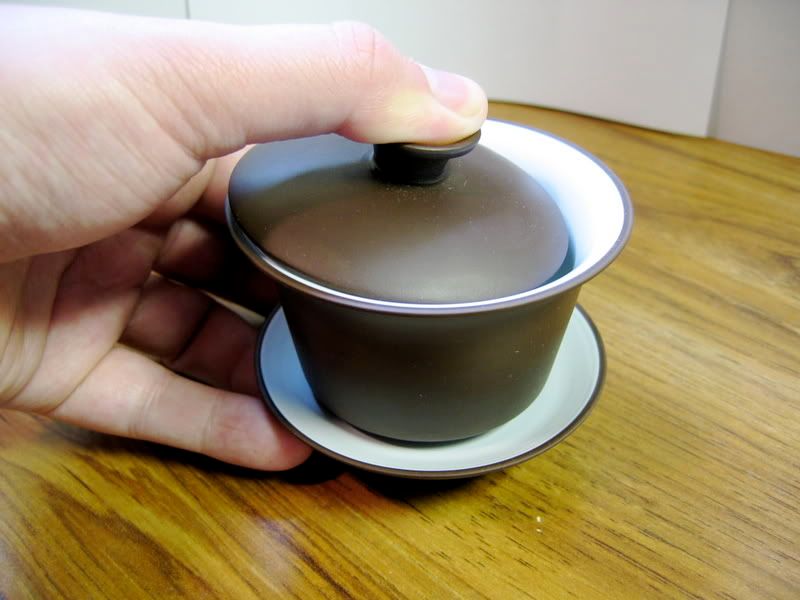 |
| Step 3: Securely grasp the gaiwan. Apply pressure with your thumb and fingers, so that nothing moves. | 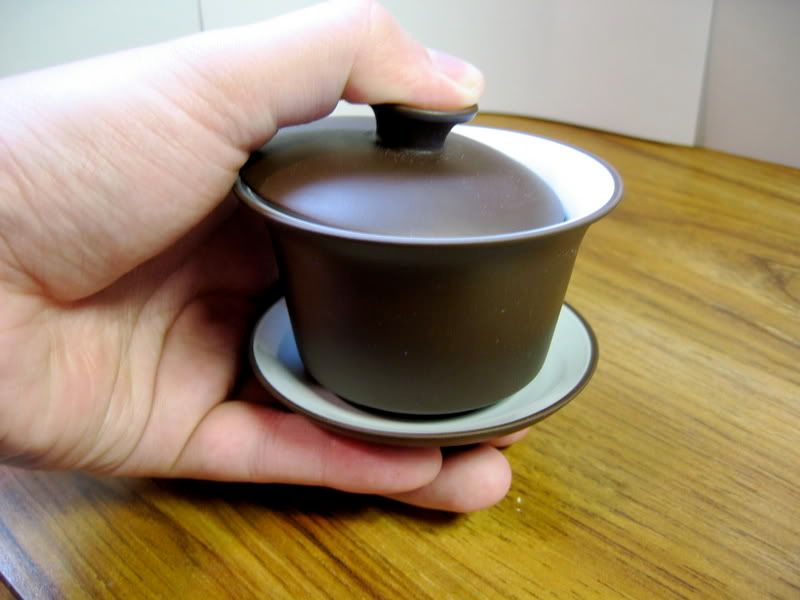 |
| Step 4: Holding the three parts securely in place, turn over gaiwan to decant the liquor. Though it is not shown in the photo, I would suggest pouring into a small pitcher or cup, rather than onto a desk. | 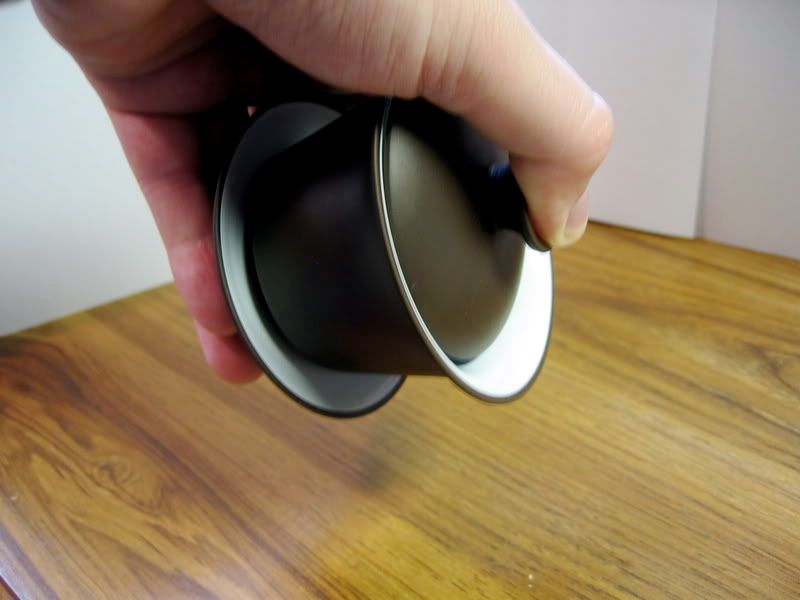 |
Many stores sell wooden or ceramic tea trays for you to do your gaiwan brewing on. While I could see how they would be convenient, I hardly consider this a necessity (I don't have one). Still, I would suggest staying far, far away from expensive electronics while you work out the kinks in your technique.
Wrap upGaiwans are extremely versatile, and quite good at what they do. While they may not be as good as yixing pots for many Chinese teas, you do not need to worry about brewing vastly different types of tea with a glazed gaiwan. The best part? They're cheap, and they're all over the internet.
The one shown in this article is from ebay, and was only $8.00! I actually paid more ($8.50) for the shipping from China than for the actual item. $16.50 is pretty hard to beat as far as teaware is concerned, and I'm sure there are even cheaper gaiwans out there. The only thing to be aware of is that glazes in cheap Chinese ceramics may contain lead, but a lead testing kit can be purchased quite inexpensively from your local hardware store.
Now, go forth and brew!


